Remote PC Settings
A remote PC is a virtualized PC or virtualized server that is remotely accessible and configurable by lab users. Virtual machines are implemented using supported third-party virtualization products:
Proxmox Virtual Environment (VE)


The flexibility and broad selection of operating systems and configurations that may be provisioned on a virtual machine offer great potential to support IT training in a wide range of disciplines using NETLAB+.
Adding remote PCs using Pod Designer is fairly straightforward. Each remote PC is given a name and an icon designation of “PC” or “server”. A pod may contain very little information about remote PCs. Most of the remote PC settings are determined by the administrator when an actual pod is added to the system. Remote PCs are added and managed from the Remote PC tab.
Critical: QEMU Guest Agent Required
ALL custom virtual machines used in NETLAB+ pods MUST have qemu-guest-agent installed and enabled.
Without qemu-guest-agent:
VMs will NOT gracefully start up or shut down - causing potential data corruption and failed operations
VMs will appear to consume >90% memory even when idle - memory ballooning fails, causing apparent memory exhaustion
Snapshots and migrations will fail - critical pod operations will not work
Disk space reclamation (guest-trim) will not function - wasted storage space
Display features will not work - clipboard, dynamic sizing unavailable
Learn more: Proxmox QEMU Guest Agent documentation
Installation instructions for NETLAB+ (choose your OS):
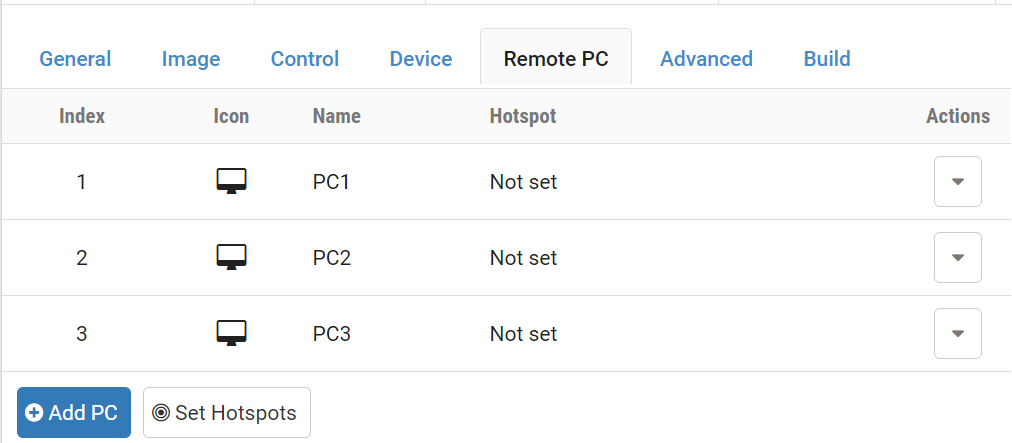
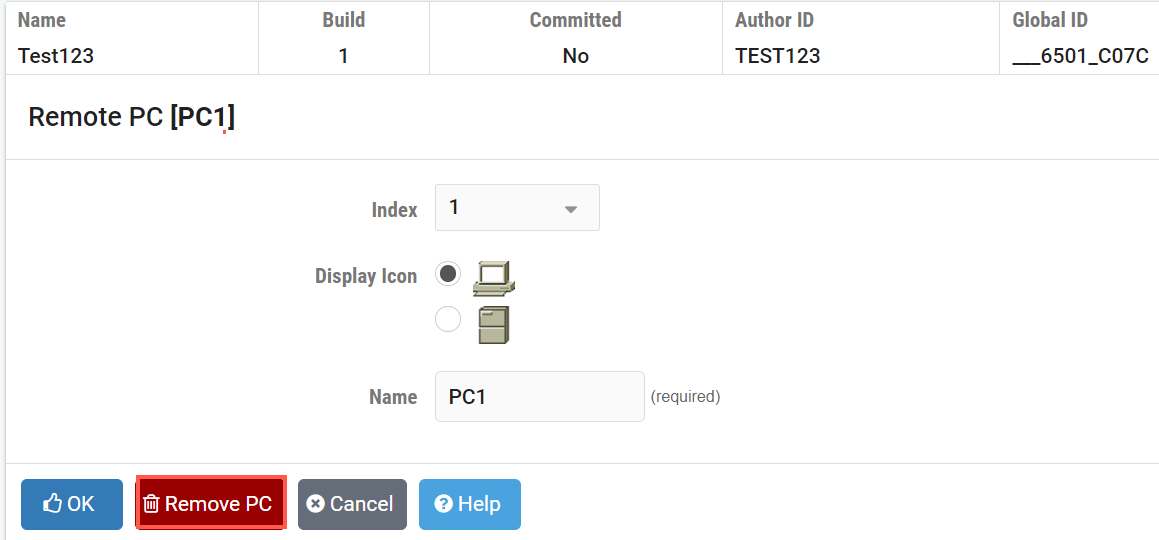
Adding a Remote PC
Click on the Add PC button.
NETLAB+ will display the New Remote PC dialog.
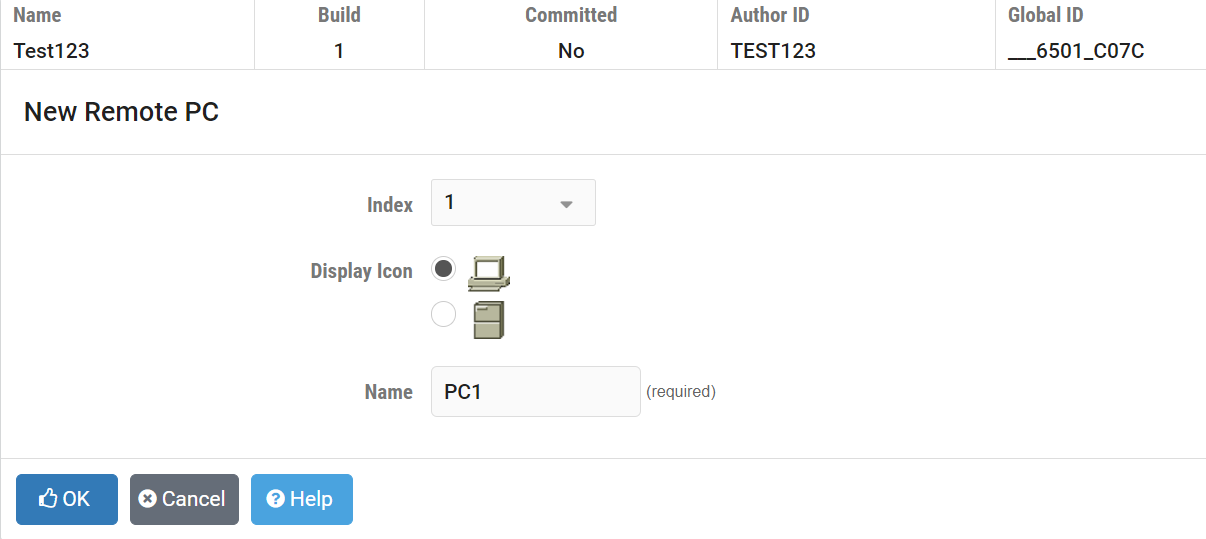
Enter the settings for the remote PC.
- Index:
Determines the order in which the PC will appear in the various lab access tabs.
- Display Icon:
Determines which icon (PC or server) will be associated with the PC and displayed on various pages. This setting only affects the icon that is shown. It does not affect functionality.
- Name:
The name of the PC.
Click the OK button to save the remote PC.
Setting Hotspots
You may define clickable hotspots for PCs shown on the default topology image. A hotspot is an invisible rectangular area placed on top of a remote PC in the image. When a user clicks on a hotspot, NETLAB+ will launch the appropriate remote PC viewer and connect to the virtual machine.
Please see the hotspots section for more information on how to set hotspots.
Modifying a Remote PC
Select Edit on the Actions dropdown for the remote PC
you wish to modify.
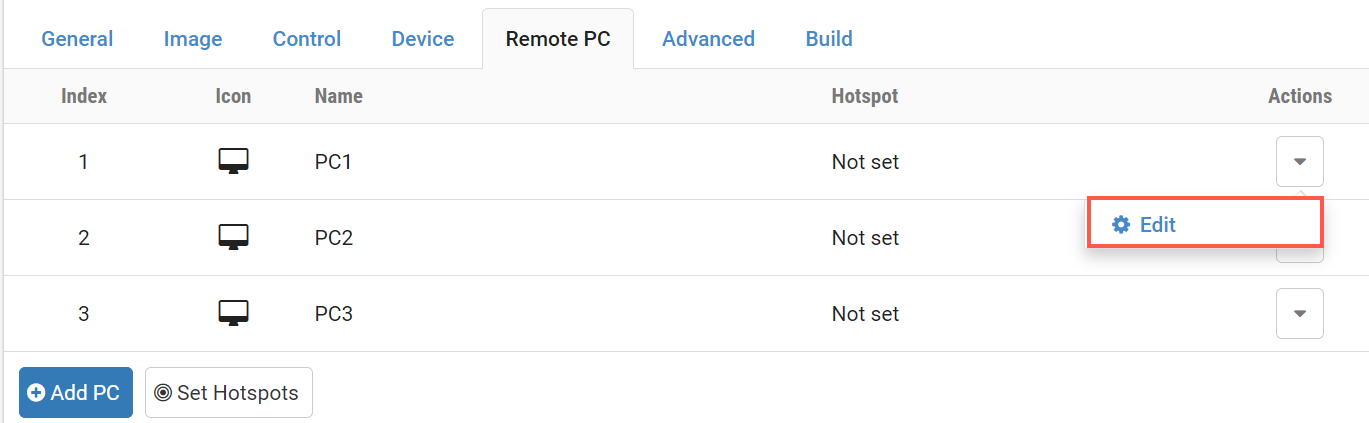
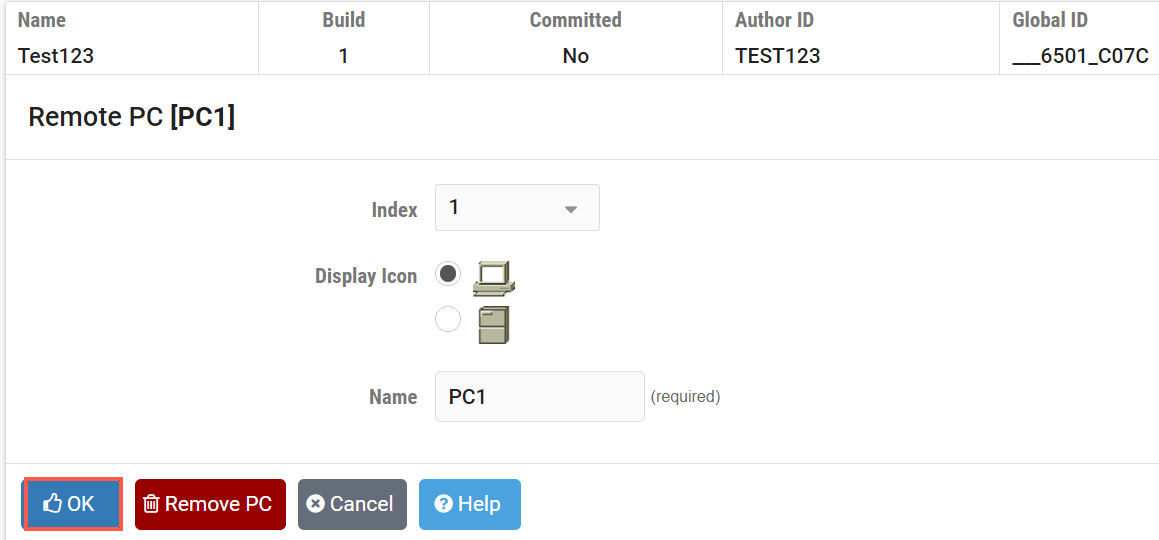
Modify the settings as needed.
Click the OK button to save the changes.
Removing a Remote PC
Select Edit on the Actions dropdown for the remote PC
you wish to modify.
Click the Remove PC button.
Important
You cannot change the number or position of remote PCs after the pod design has been committed. You must Retool or Clone the pod design to make such changes.