Web Interface
The administrator web interface is used for most of the administrative functions of the NETLAB+ system.
Note
The system requires an IP address before the web interface can be accessed. Refer to the System Console section for information on how to configure the system IP address.
Browser Support
The NETLAB+ web interface supports the latest versions of most browsers based on Chromium or WebKit.
Google Chrome
Safari
Mozilla Firefox
Microsoft Edge
Warning
Internet Explorer is not supported.
Login
Access the web interface using the IP address or hostname assigned to the system. The system must be powered on and connected to the network.
https://<ip_address>/
https://<hostname>/
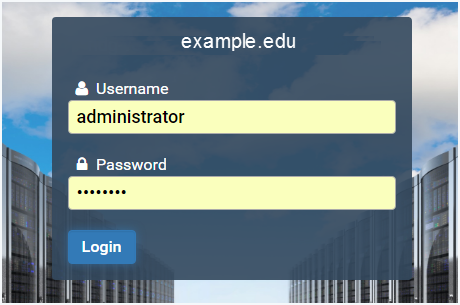
Enter the username and password to log in, then click the Login button.
Username |
Password |
|---|---|
|
If you changed the administrator password as directed while configuring the NETLAB+ console, then use that password. If you have not yet changed the administrator password, enter the factory default, |
Note
If the default password netlab was used, you will be prompted to
change the password during the first login. Password requirements can be
controlled by the system administrator, but the default settings require
a password that is at least 8 characters long.
Important
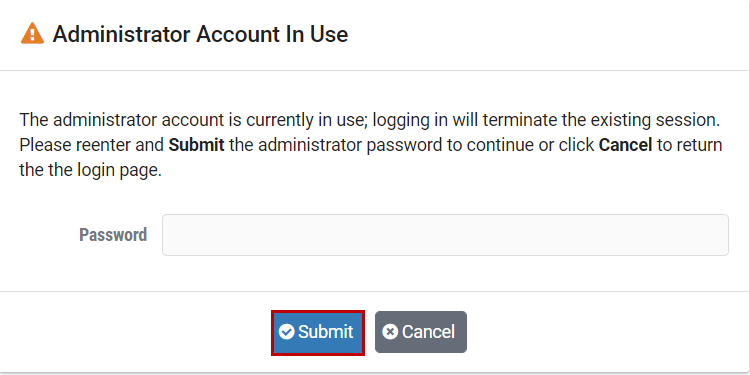
The NETLAB+ Administrator account does not allow multiple login sessions to run concurrently. If the administrator account is currently in use, a subsequent login will terminate the existing session.
A warning will display if the administrator account is currently in use, allowing the user to choose to continue logging in (which will terminate the existing session) or cancel and return to the login page. This can help prevent interruptions when working with others or when interacting with NDG Support.
Home Page
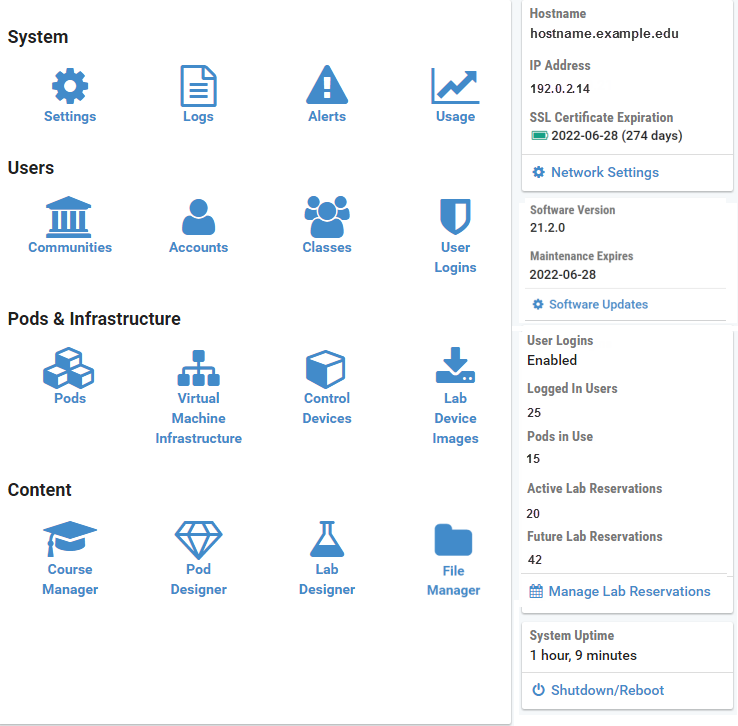
After a successful login, the Administrator Home page will be
displayed. The home page is abbreviated using the icon throught the
documentation. The functions in the main panel include displaying various system
logs and alerts, user management, pods and infrastructure, and content
management. Select any function by clicking on the icon or the function name. On
the right, system information is displayed.
Logout
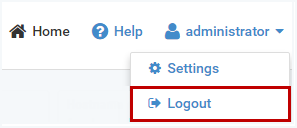
Navigate to
Click Administrator (top-right corner)
Select Logout from the drop-down menu.
Warning
Logging out of the system is particularly important when using a shared computer, to prevent others from gaining access to your Administrator account.

Click Login Again to return to the login page.
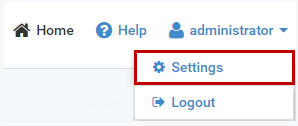
Administrator Settings
Navigate to
Click Administrator (top-right corner)
Select Settings from the drop-down menu.
The Settings page will display the administrator’s current settings.
Note
The settings displayed here only affect the administrator account. They do not affect the settings of other users.

The Change Password, Change Email, and
date/time Settings buttons may be selected to update the
information displayed.
Password
Click Change Password on the Settings page.
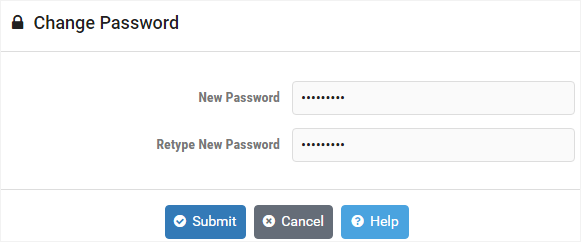
The system administrator can set the password requirements. The default settings require a password that is at least 8 characters long.
Tip
Changing the administrator account password also changes the system console password. The same password is used for both functions.
Enter a new password.
Re-enter the new password in the Confirm Password field.
Click Submit to save changes or Cancel.
Email Address
Entering an email address is optional but highly recommended.
Click Change Email on the Settings page.
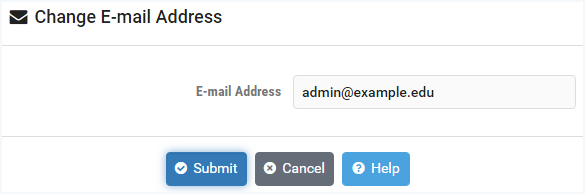
Update the e-mail address as desired or leave blank.
Click Submit to save changes or Cancel.
Date and Time
Date and time settings are important to ensure that information is accurately displayed when using the scheduler.
Click the date and time Settings button on the
Note
The settings displayed here only affect administrator account. Each user can set their own date and time settings.
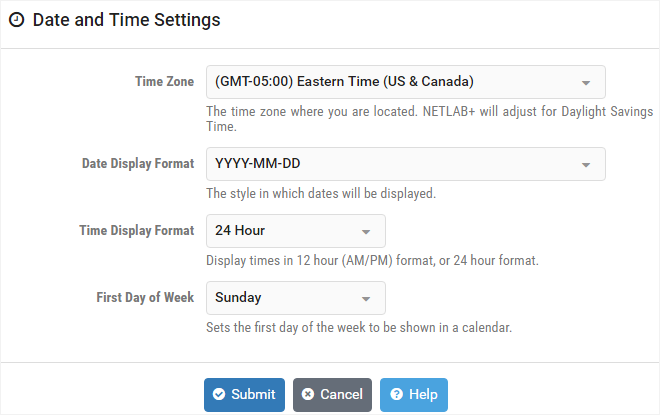
- Time Zone:
The time zone where you are located. NETLAB+ will adjust for daylight savings time if required.
- Date Display Format:
The style that dates will be displayed (for example, YYYY-MM-DD).
- Time Display Format:
Time may be displayed in 12-hour (AM/PM) format or 24-hour format.
- First Day of the Week:
The first day to be shown in the scheduling calendar.
Tip
When traveling, you can change your time zone to match the local time.
Click Submit to save changes or Cancel.