Setup NVMe SSD Datastores
This section will walk you through setting up your NVMe datastores for VMs. This guide will also update the local datastore to make sure VMs cannot be stored there.
Note
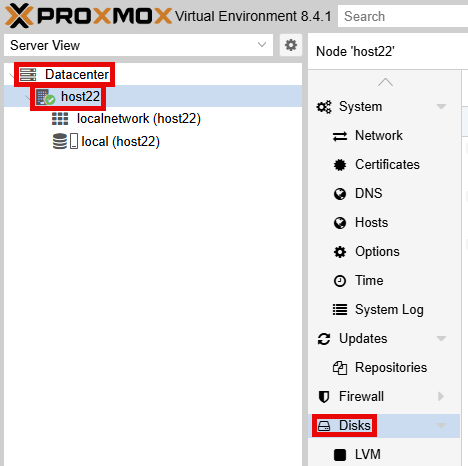
In this example, the server is host22. This is also being completed on an older Lenovo High Performance Server specification from NDG with two NVMe SSD drives. Your system may vary.
Using your navigation panels, in the Resource Tree, navigate to Datacenter > your_server. In the Content Panel, select Disks.
You should see a similar output below:
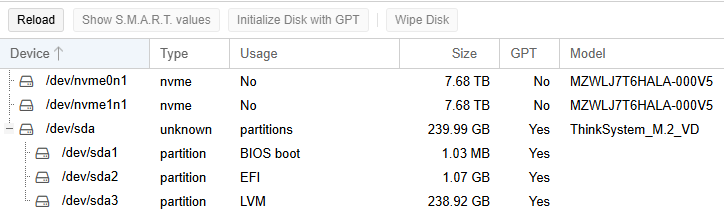
Device |
Type |
Datastore Name |
Use |
Content Tags |
|---|---|---|---|---|
|
nvme |
NETLAB1 |
Primary drive |
|
|
nvme |
NETLAB2 |
Secondary drive (optional for older systems with two NVMe drives) |
|
|
unknown (M.2 SATA SSD) |
local |
Proxmox Operating System Disk |
|
Confirm /dev/nvme0n1 has Usage of No. If you have additional nvme drives, confirm they also have a Usage of No.
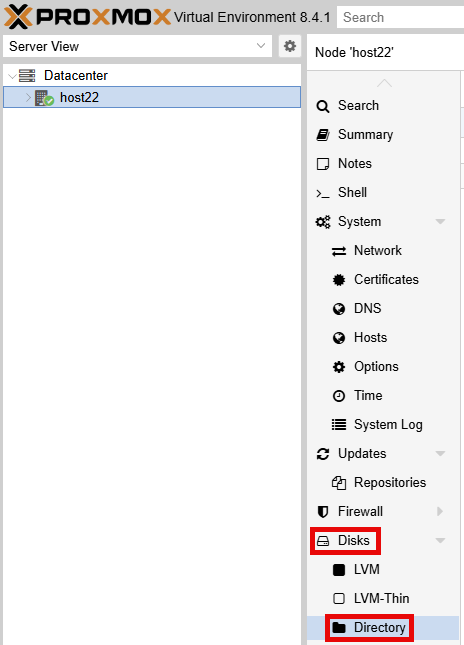
Create Directory Partition
In the Content Panel, select Disks > Directory.
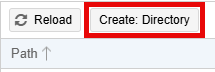
Click the Create: Directory button.
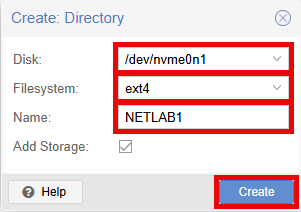
In the Create: Directory window, select /dev/nvme0n1 in the Disk field.
Select ext4 in the Filesystem field.
Type NETLAB1 in the Name field.
Click the Create button.
If you have an additional NVMe drive like /dev/nvme1n1, repeat this process. Confirm each device is listed now.

Adjust Storage Settings
Adjust NVMe Storage
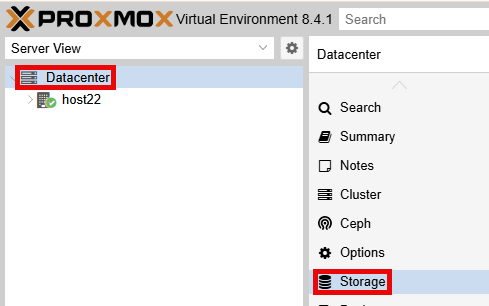
Using your navigation panels, in the Resource Tree, navigate to Datacenter. In the Content Panel, select Storage.
You should see a similar output below:

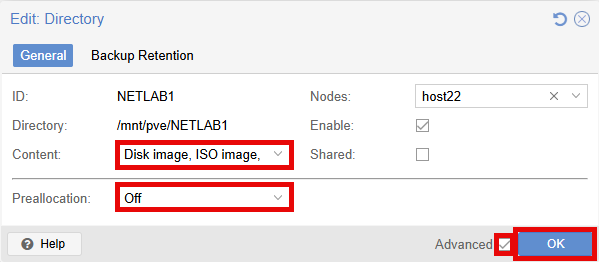
Select NETLAB1 and click the Edit button.

In the Edit: Directory popup window, click the dropdown arrow for the Content field, select the following: Disk Image, ISO Image, Container Template, Backup, Container, Import.
Click the checkbox for Advanced.
Select Off in the Preallocation field.
Click the OK button.
If you have an additional directory like NETLAB2, repeat this process.
Adjust local Storage
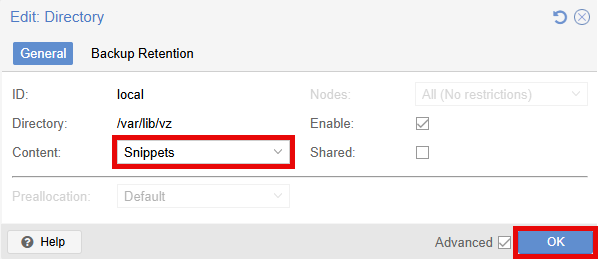
Select local and click the Edit button.

In the Edit: Directory popup window, click the dropdown arrow for the Content field, select only the Snippets tag.
Click the OK button.
Final Result:
