Setup Networking
This section will walk you through setting up your Proxmox VE networking.
Note
In this example, the server is host22. Your system may vary.
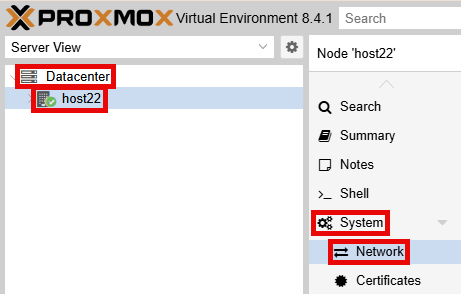
Using your navigation panels, in the Resource Tree, navigate to Datacenter > your_server. In the Content Panel, select System > Network.
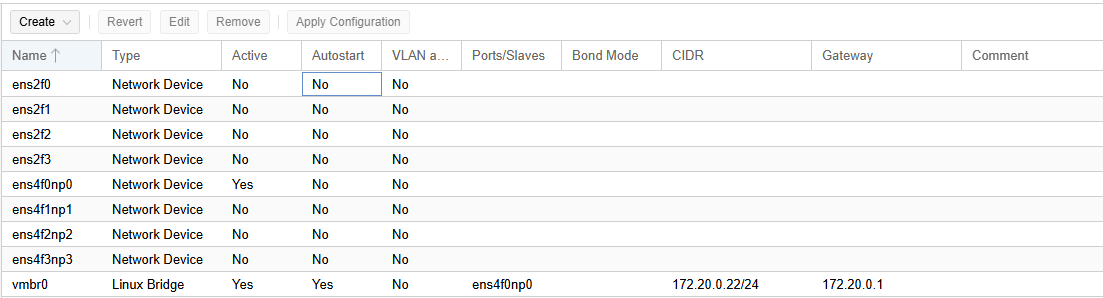
You should see a similar output below:
Interface |
Speed |
Recommended Use |
|---|---|---|
ens4f0np0 |
10 Gbps |
Management Interface |
ens4f0np1 |
10 Gbps |
Cluster Network |
ens4f0np2 |
10 Gbps |
User Network (Used for Pod Internet) (optional) |
ens4f0np3 |
10 Gbps |
Storage/NFS Network (Used high speed backups) (optional) |
ens2f0 |
1 Gbps |
NLCONTROL Network (Used for real equipment) (optional) |
ens2f1 |
1 Gbps |
Available |
ens2f2 |
1 Gbps |
Available |
ens2f3 |
1 Gbps |
Available |
Create a Safe Staging Network
In this section, you will be creating a Safe Staging Network called SAFETY_NET to connect the virtual machines temporarily.
The Safe Staging Network consists of a virtual switch and a port group that is not connected to any other networks (virtual or real).
Should the virtual machine be powered on, its traffic will be confined to the SAFETY_NET.
This ensures that the virtual machine will not pose a security risk to your campus LAN or interfere with other pods until it is relocated to its final network via automatic or manual networking.
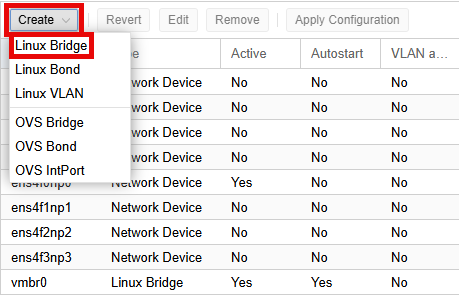
In the Content Panel, select System > Network. Select Create > Linux Bridge.
Note
In Proxmox, a Linux Bridge acts like a virtual switch to connect VMs to the physical network. Allows communication through a virtual interface.
SAFETY_NET is NOT connected to any physical network. This is confirmed by leaving the Bridge ports field empty.
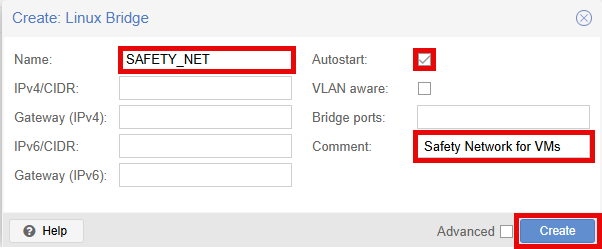
In the Create: Linux Bridge popup window, in the Name field, enter SAFETY_NET.
Make sure Autostart is checked.
In the Comment field enter Safety Network for VMs.
Click the Create button.
Warning
The safety network is an ideal place to bind the network interface(s) of golden virtual machines. Automatic networking will bind network interfaces of cloned VMs to their runtime networks when their respective pods are started.
Click the Apply Configuration button.
In the Confirm popup window, click the Yes button to apply network changes.
Create Cluster Network
In this section, you will be creating a Cluster Network that will be used for cluster communication. By default, virtual machine cloning/migrating happens on the Management network (vmbr0). This should be a sandbox network with no routing to other networks. Proxmox VE recommends this be the lowest latency network available, meaning the servers should all be on the same physical switch if possible.
In the Content Panel, select System > Network. Select the interface you want to set to the cluster network and click Edit.
In the Edit: Network Device popup window, enter your CLUSTER_NET Host IP Address in the IPv4/CIDR field.
Make sure the Gateway (IPv4) field is empty.
Click the checkbox for Autostart.
In the Comment field, enter CLUSTER_NET.
Click the OK button to save settings.

Click the Apply Configuration button at the top.
In the Confirm popup window, click the Yes button to apply network changes.
Create NLCONTROL network for real equipment (optional)
In this section, you will be creating a real equipment network called NLCONTROL to connect real equipment pods.
This is only required if you intend to deploy real equipment.
Warning
This network must be called NLCONTROL in order for NETLAB+ to communicate properly.
In the Content Panel, select System > Network. Select Create > Linux Bridge.
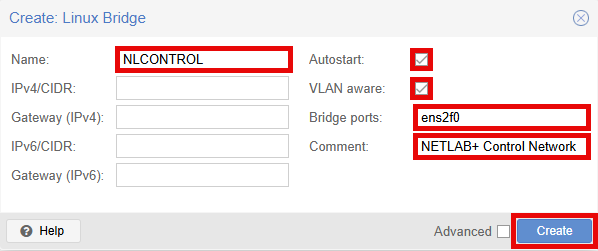
In the Create: Linux Bridge popup window, in the Name field, enter NLCONTROL.
Make sure Autostart is checked.
Make sure VLAN aware is checked.
In the Bridge ports field type the network device for real equipment. In this example, ens2f0 is used.
In the Comment field enter NETLAB+ Control Network.
Click the Create button.
Click the Apply Configuration button at the top.
In the Confirm popup window, click the Yes button to apply network changes.