Configuring Your Network Settings
Network Settings
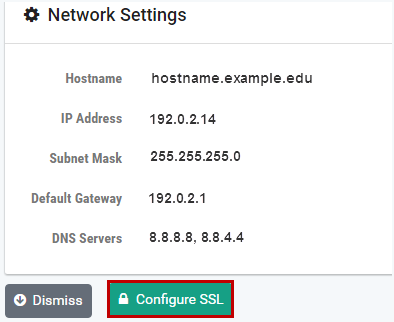
The Network Settings page allows you to review current network settings and configure the NETLAB+ system to use a signed SSL/TLS certificate.
Navigate to > Settings > Network Settings.
Alternatively, click
Network Settingslink on the top right sidebar of the administrator’s home page.

Tip
The hostname, IP, and DNS settings cannot be changed from the web interface. To change these settings, use the system console.
Managing SSL Certificates
A valid SSL/TLS certificate is required to access the NETLAB+ securely over HTTPS. NETLAB+ uses a self-signed certificate by default. This certificate is not trusted by browsers and will generate a warning message when you attempt to access the system. To avoid this warning, you must replace the self-signed certificate with a signed certificate from a trusted Certificate Authority (CA). NETLAB+ supports three methods for adding a signed certificate:
Create a new certificate signing request (CSR) and private key through NETLAB+.
Import an existing signed certificate and private key created by your organization.
Use Let’s Encrypt™ to automatically obtain a free signed certificate.
Navigate to > Settings > Network Settings
Click Configure SSL
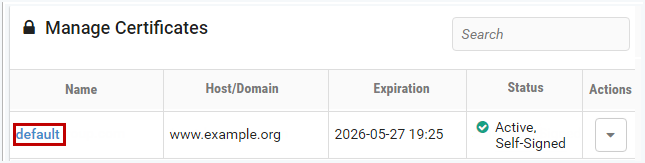
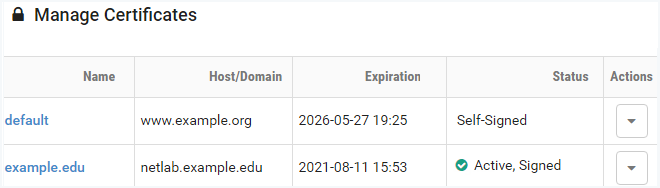
View Certificates
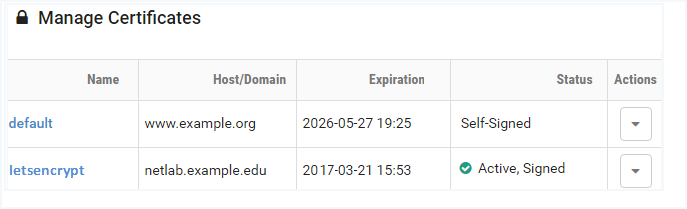
From the list of certificates, view the details of a certificate by clicking the certificate name.
To view detailed information about the certificate, click the Details button.
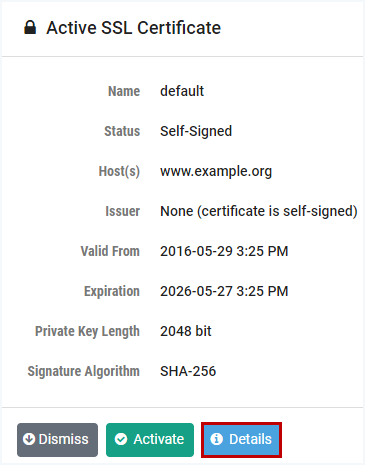
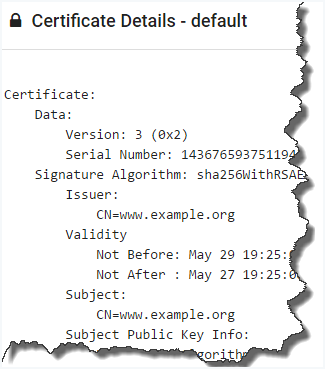
Click Dismiss to return to the previous page.
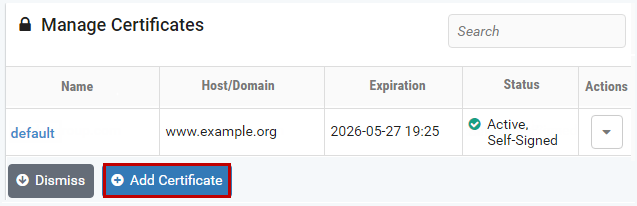
Add Certificates
To configure a signed certificate to your NETLAB+ system:
Navigate to > Settings > Network Settings
Click Configure SSL
Click Add Certificate

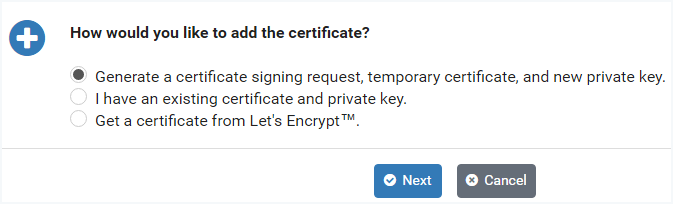
Select one of the following options and click Next.
- Generate a Certificate Signing Request:
Creates a new certificate request, temporary certificate, and new private key through NETLAB+. You will send the request to the Certificate Authority (CA) of your choice. Once you receive a signed version from the CA, you will update the certificate in NETLAB+.
- Use Existing Certificate and Private Key:
Uses an existing signed certificate and private key for your organization (this can be a domain-level certificate). You will proceed by adding the certificate and private key to your NETLAB+ system.
- Use Let’s Encrypt™:
Initiates an automated process where your NETLAB+ system will request and obtain a signed certificate from Let’s Encrypt, a free certificate authority.
Replace Certificate
Replacing a certificate is required when the certificate is about to expire or has already expired.
Note
This does not apply to the default self-signed certificate or certificates generated automatically by Let’s Encrypt™.
Navigate to > Settings > Network Settings
Click Configure SSL
Note
If the certificate you want to replace is active, you must first
activate another certificate. Click the action dropdown
next to the certificate and select Activate. Typically you would activate the
default self-signed certificate temporarily.
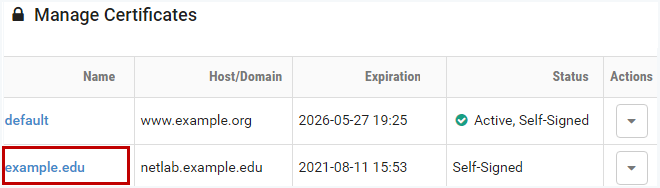
Select the certificate you want to replace, which should now be inactive.

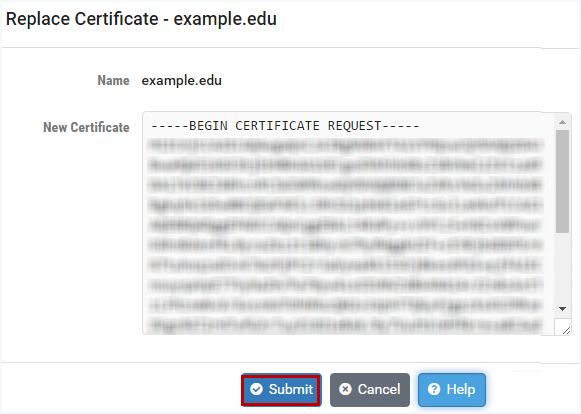
Click Replace
Paste the signed certificate you received from the CA into the New Certificate text box, including the header and footer lines.
Note
The certificate must be in PEM format. The PEM certificate format uses the following header and footer lines, which should should be included:
-----BEGIN CERTIFICATE-----
-----END CERTIFICATE-----
Click Submit
Activate the new certificate.
Activate Certificate
To make a certificate active:
Navigate to > Settings > Network Settings
Click Configure SSL
Select the certificate you want to activate. Normally this should be a valid signed certificate that has not expired.

Click Activate and confirm the action.

Verify that the signed certificate is now active. If the signed certificate is not active, it may be necessary to log off the system, close your browser window, and then re-enter the system.
Tip
Unless you are using a self-signed certificate, your browser should indicate that the connection is secure.

Delete Certificate
Navigate to > Settings > Network Settings
Click Configure SSL
Select the certificate you want to remove.
Click Delete
Click OK to confirm the removal of the certificate.
Note
Neither the default self-signed certificate nor the active certificate can be removed.
The default self-signed certificate is used to access the system when no other certificate is available.
To delete the active certificate, you must first activate another certificate, such as the default.
Generate Certificate
This option allows you to generate a certificate signing request (CSR) and temporary certificate. You will send the CSR to the Certificate Authority (CA) of your choice. Once you receive a signed version from the CA, you will update the certificate in NETLAB+. Use this option if you do not have a signed certificate and private key for your organization, or you do not want to use Let’s Encrypt.
Navigate to > Settings > Network Settings
Click Configure SSL
Click Add Certificate
Select the option to Generate a Certificate Signing Request
Click Next
Create Certificate Signing Request
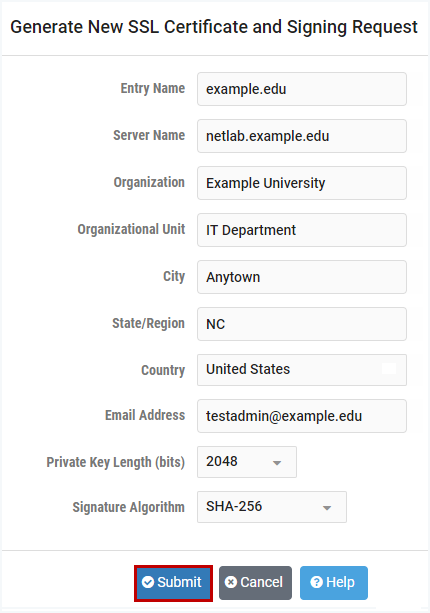
Fill in the fields on the form with the information appropriate for your site.
- Entry Name:
The name used to manage this certificate. The hostname is recommended. Letters must be lowercase. No spaces are permitted.
Example: netlab.myschool.edu
- Server Name:
The fully qualified domain name (FQDN) of your server. This name must match exactly what you type in your web browser, or you will receive a name mismatch error. Wildcard certificates cannot be generated by NETLAB+.
Example: netlab.example.edu
- Organization:
The legal name of your organization. This should not be abbreviated and should include suffixes such as Inc, Corp, or LLC.
Example: Digitech College of Southern California
- Organizational Unit:
The division of your organization handling the certificate.
Example: Computer Science Department
- City:
The city where your organization is located.
Example: Los Angeles
- State/Region:
The state or region where your organization is located. This should not be abbreviated.
Example: California
- Country:
The country where your organization is located.
Example: United States
- Email Address:
An email address used to contact your organization.
Example: support@example.edu
- Private Key Length (bits):
The length of the private key to generate in bits.
2048 is recommended and now required by most certificate authorities. 4096-bit certificates are currently not supported for performance reasons.
- Signature Algorithm:
The algorithm used to sign the request.
SHA-256 is now used by most certificate authorities. SHA-1 is an older algorithm and is no longer recommended.
Click Submit
NETLAB+ has generated a new private key, certificate signing request, and self-signed certificate.
Download Certificate Signing Request
Click Download Certificate Signing Request
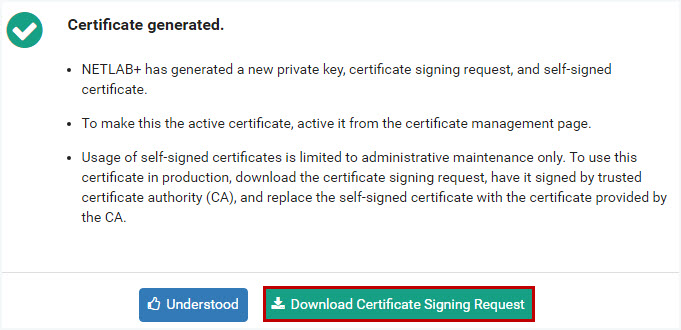
The certificate signing request (a file of encrypted text named Entry Name.csr) will be downloaded to your local machine. Submit this file to the Certificate Authority (CA) of your choice. Typically, a small annual fee is charged by the CA for this service. After you receive a signed version of your certificate from the CA, you will use it to replace the unsigned version.
Replace Self-Signed Certificate
Navigate to > Network Settings
Click Configure SSL
You will be replacing the self-signed certificate that you created. The default certificate is indicated to be the active certificate. This is necessary since you cannot replace an active certificate. If the default is not currently the active certificate, select it and the option to activate it on the Action dropdown.
Select the self-signed certificate you created.
Click Replace button to replace the certificate.
Paste the signed certificate you received (.pem or .crt format) from
the CA into the New Certificate text box, including the header and footer
lines, and click Submit.
Note
The certificate must be in PEM format. The PEM certificate format uses the following header and footer lines, which should be included:
-----BEGIN CERTIFICATE-----
-----END CERTIFICATE-----
Return to the certificate page.
Verify that your certificate now indicates it is signed (as shown below).
Click Activate.
You will be prompted to confirm that you want to activate the certificate.
Select Proceed.
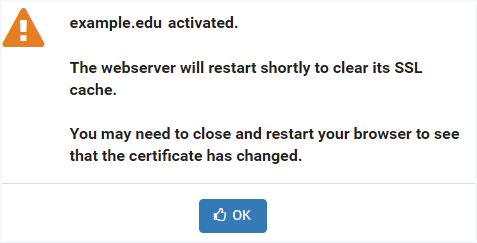
A message will indicate that the certificate has been activated and that the webserver will restart shortly to clear its SSL cache.
Click OK
Verify that the signed certificate is now active (see the Status in the picture below). If the signed certificate is not active, it may be necessary to log off the system, close your browser window, and then re-enter the system.
Verify that your browser address now indicates HTTPS. It may be necessary to log off the system, close your browser window, and then re-enter the system.
Import Certificate
This option allows you to import a signed certificate and private key that you have already created. This is typically used when you have a domain-level certificate.
Navigate to > Network Settings > Configure SSL
Note
If this is your first time adding a certificate, you will see that the self-signed certificate that is included with NETLAB+ is initially the active certificate.
Click Add Certificate
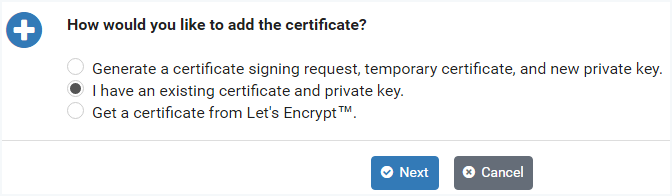
Select I have an existing certificate and private key
Click Next
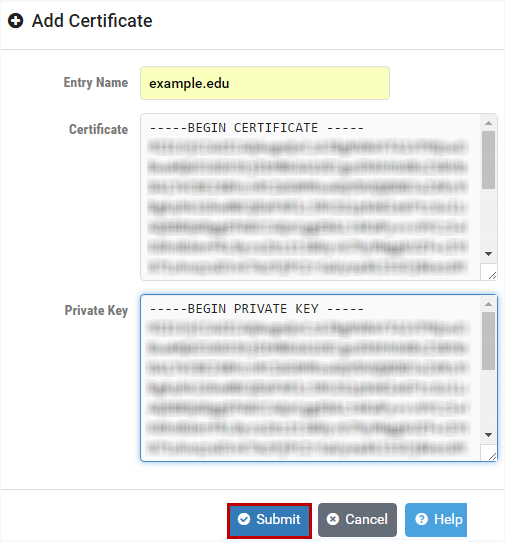
Fill in the Add Certificate form with the following information:
- Entry Name:
The name of the certificate. By default, the hostname is used. This name is used to identify the certificate in the list of certificates. The name must be lowercase and no spaces are permitted.
- Certificate:
The text from the signed certificate in PEM format. The PEM certificate format uses the following header and footer lines, which should be included:
-----BEGIN CERTIFICATE-----
-----END CERTIFICATE-----
- Private Key:
The text from the private key in PEM format. The PEM certificate format uses the following header and footer lines, which should be included:
-----BEGIN PRIVATE KEY-----
-----END PRIVATE KEY-----
Click Submit
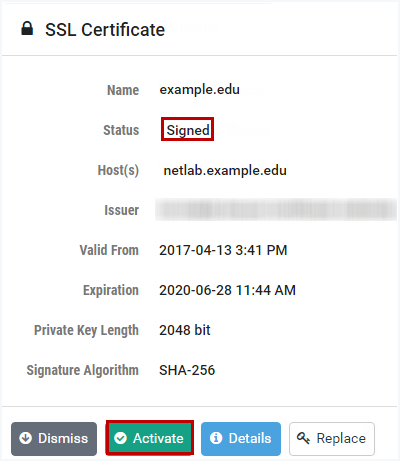
Return to the certificate page.
Verify that your certificate now indicates it is signed.
Click Activate
You will be prompted to confirm that you want to activate the certificate.
Click Proceed
A message will indicate that the certificate has been activated and that the webserver will restart shortly to clear its SSL cache.
Click OK
Verify that the signed certificate is now active (see the Status in the picture below). If the signed certificate is not active, it may be necessary to log off the system, close your browser window, and then re-enter the system.
Verify that your browser address now indicates HTTPS. It may be necessary to log off the system, close your browser window, and then re-enter the system.
Let’s Encrypt
This option allows you to obtain a signed certificate from Let’s Encrypt, a free certificate authority. Your NETLAB+ system will interact with Let’s Encrypt to request the signed certificate and respond to a challenge issued by Let’s Encrypt to verify control of the domain.
Important
The following requirements must be met to use Let’s Encrypt:
Your system must have an Internet-accessible public DNS entry.
Both Ports 80 and 443 must be accessible and open through the firewall.
Navigate to > Settings > Network Settings
Click Configure SSL
Click Add Certificate
Select the option Get a certificate from Let's Encrypt
Click Next
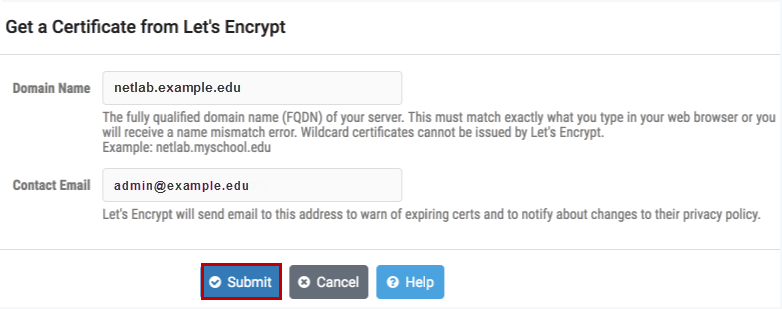
Enter the appropriate information into the fields (see field descriptions below).
- Domain Name:
The fully qualified domain name (FQDN) of your server. This name must match exactly what you type in your web browser, or you will receive a name mismatch error. Wildcard certificates cannot be issued by Let’s Encrypt.
- Contact Email:
Let’s Encrypt will send email to this address to warn of expiring certificates and to notify about changes to their privacy policy.
Be sure to enter the address of an email account that is checked on a regular basis to ensure that your organization is kept aware of any issues with the certificate.
Click Submit
A message will confirm that the certificate has been generated.

Click Understood
Notice the expiration date. The certificate will expire in 90 days.
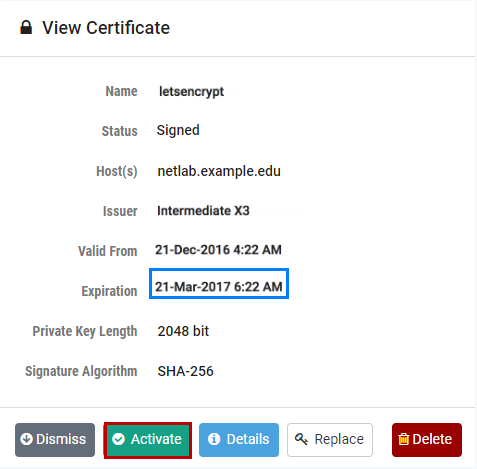
Click Activate
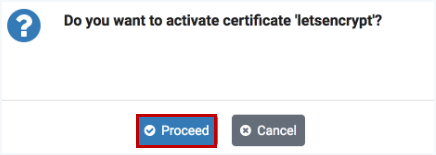
Click Proceed to confirm that you want to
activate the certificate.
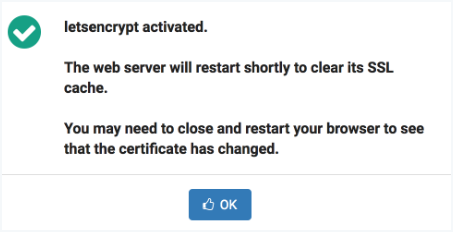
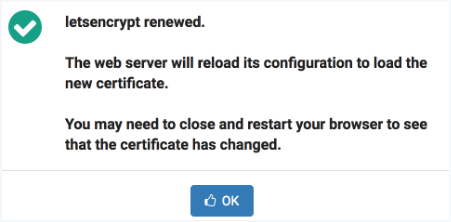
The letsencrypt certificate is activated. As noted, you may need to restart your browser to see that the certificate has changed.
Verify that the letsencrypt certificate is now active and you browswer address indicates HTTPS.
Tip
If the Let’s Encrypt certificate is not active, it may be necessary to log off the system, close your browser window, and then re-enter the system.
Verify that your browser address now indicates HTTPS. It may be necessary to log off the system, close your browser window, and then re-enter the system.
Under normal operating conditions, no administrator action is required to renew the certificate. If system outages for an extensive period have prevented the automatic renewal from executing, the certificate will expire at the end of the 90-day period.
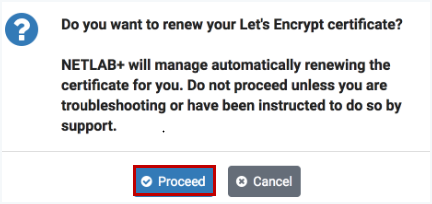
The administrator may initiate a request to renew the certificate by clicking
the Renew button on the View Certificate page. However, before
proceeding, we recommend contacting our support
team for assistance in
troubleshooting/resolving any problems with the automated process.

As noted, click Proceed if you have been instructed to perform this step by our support team.
Click OK to confirm that you want to
renew the certificate.
You may need to close and restart your browser to see the updates to the certificate.