Configuring the NETLAB+ Console
In order to enable web browser access and basic functionality, networking must be configured on the NETLAB+ virtual machine console using Proxmox VE. Complete the steps in the subsections below.
Power On NETLAB+ Console on Proxmox VE
Right-click the NETLAB-VE-V25 in the Resource Tree.
Select Start.

Launch NETLAB+ Console on Proxmox VE
Login to the Proxmox VE web interface.
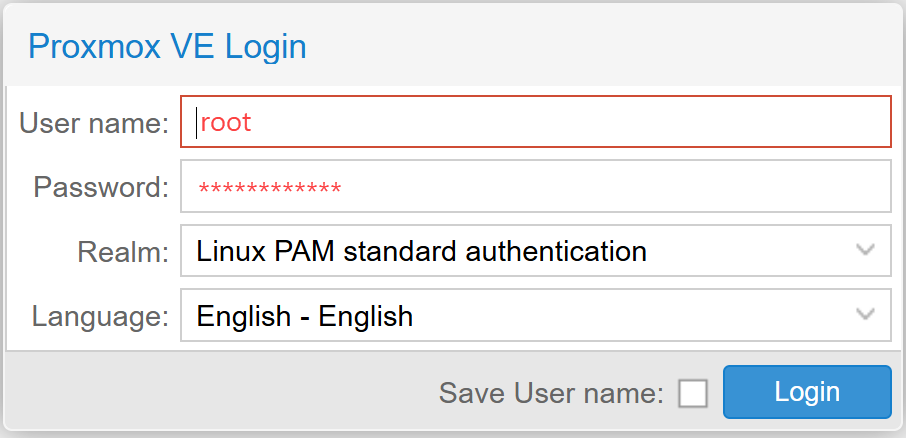
Confirm the NETLAB-VE-V25 is highlighted in the Resource Tree
Click the >_Console in the upper right hand corner.

The NETLAB+ Console will open in a new window.

Login to NETLAB+ Console
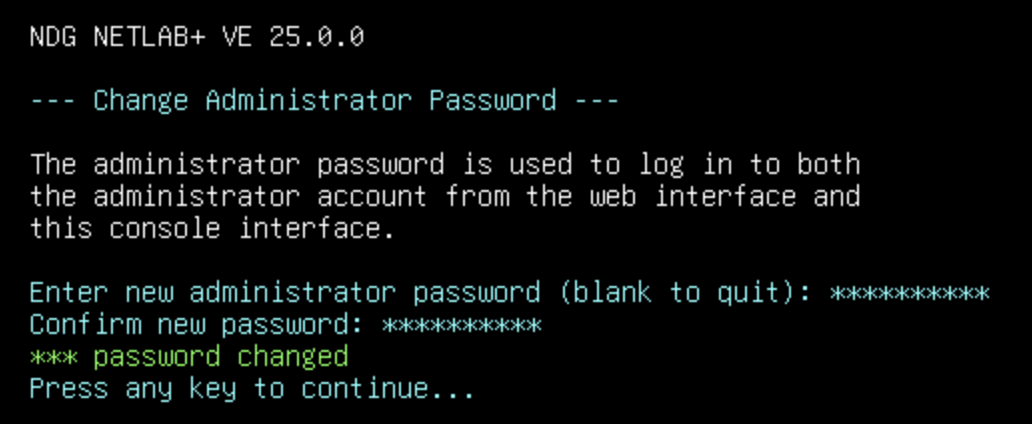
In the console window, enter the administrator password.
Note
The factory default password is all lowercase: netlab
Change the Administrator Password
Note
Passwords must meet the following requirements:
Must contain 8 or more characters.
Must not contain more than 64 characters.
Must not contain any common, English, dictionary words that are more than 3 characters long.
Must not contain the user ID for this account.
Must not contain the email address for this account.
Must not contain any names associated with this account.
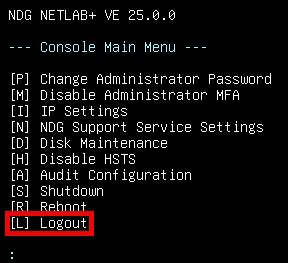
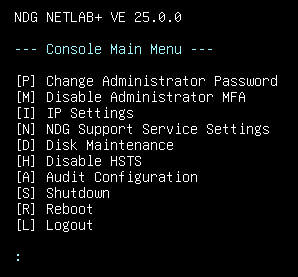
Press P to change the Administrator password.
Enter a new Administrator password.
Confirm the new password by entering it in again.
Press any key to continue.
Warning
Please record your new password in a safe place. This password will also be used to log in to the administrator web interface.
Configure Network Settings
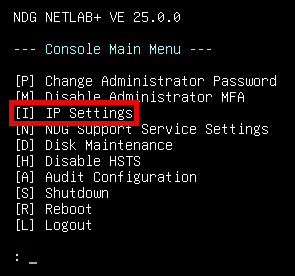
Press I for IP settings from the Console Main Menu.
Set IP Address
Press I for IP Settings.
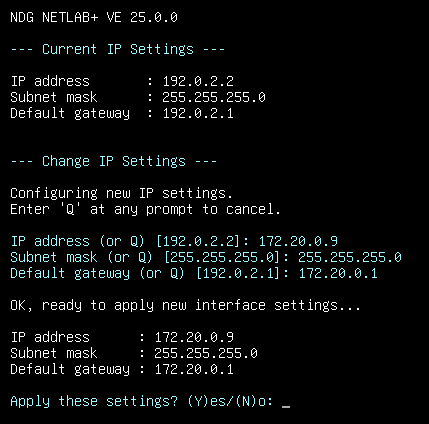
Review current settings, press Y for Yes.
Review the requirements, press Y for Yes.

Enter the subnet mask.
Enter the default gateway.
Press Y to apply the settings.
Enter the IP address.
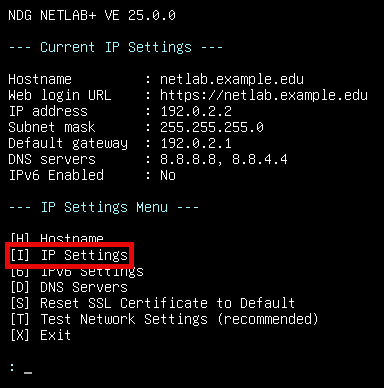
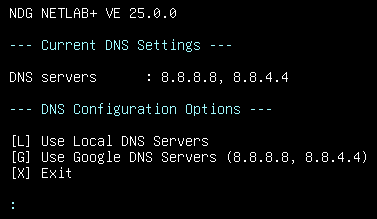
Set DNS Servers
Enter D for DNS servers.
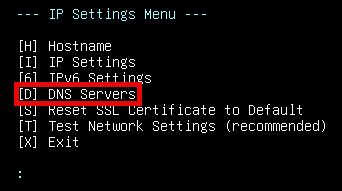
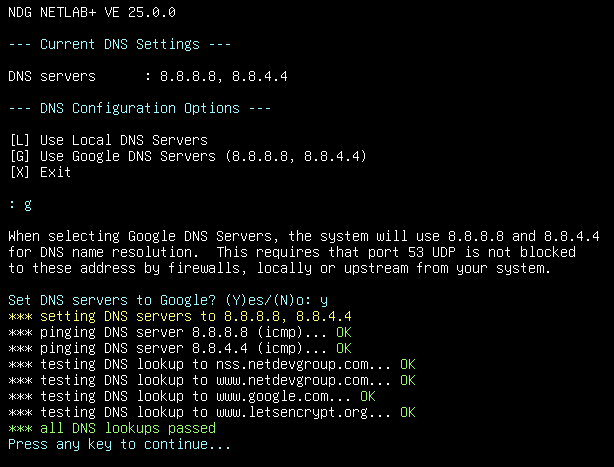
Select L or G, depending on if you are using local or Google (default is G).
Continue to follow the onscreen prompts to complete the process.
Verify that all DNS lookups pass. Press any key to continue.
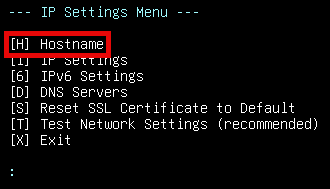
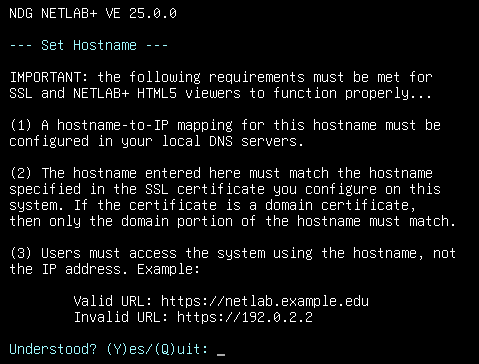
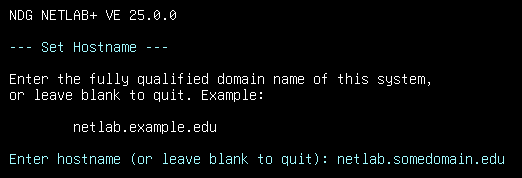
Set Hostname
Press H for Hostname.
Review the requirements and then press Y for Yes.
Enter your Hostname, press Enter.
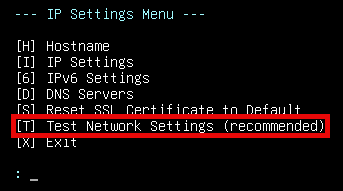
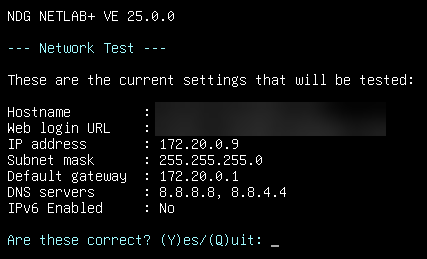
Test Network Settings
Press T to test the network settings.
Review the requirements and then press Y for Yes.
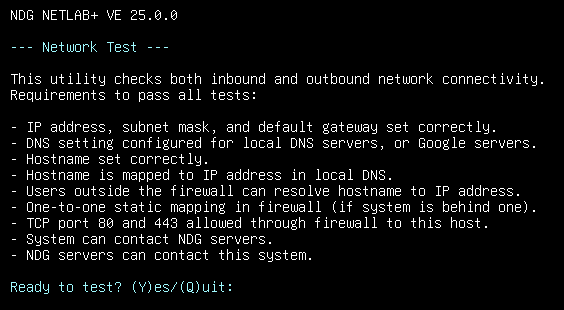
Verify that the settings are correct and then respond with Y to proceed with the test.
Verify that the settings are correct and then press any key to continue. You should see results similar to the following:
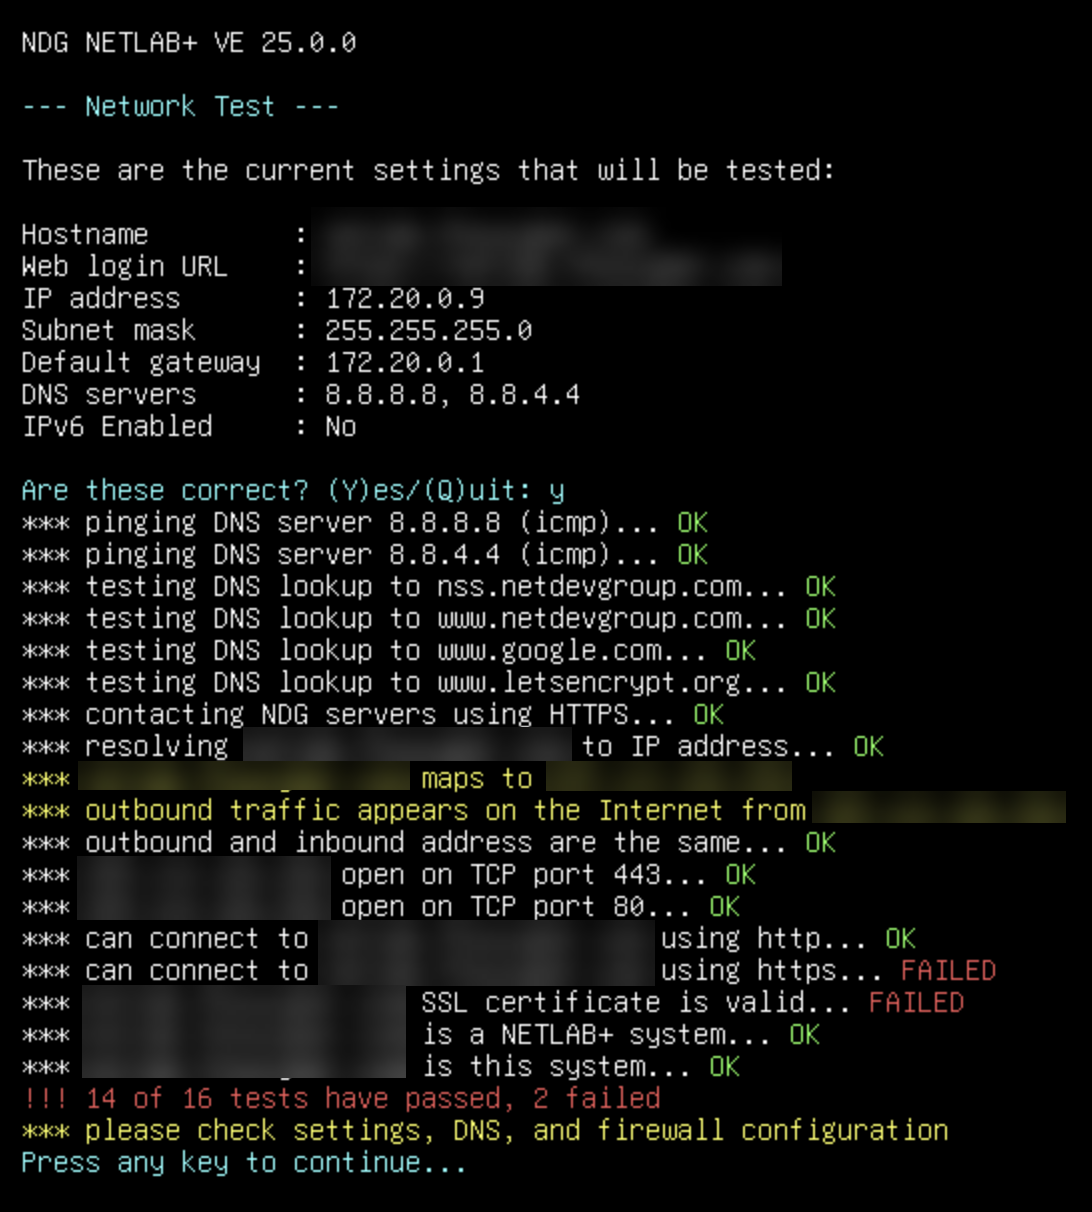
Note
There are two tests that will fail: can connect to server using https and server SSL certificate is valid.
This is normal as you have not yet configured SSL. You will complete this through the web browser.
Enter X to exit the IP settings.

Press L to logout.