Pod Cloning
This section will help you create multiple student pods. The following sections describe the NETLAB+ pod cloning feature used to create student pods on one or two host systems.
Pod Categories
NETLAB+ has three pod categories:
A master pod refers to the main staging pod on the management server. This pod consists of the master virtual
machines that were deployed from the NDG VM Distribution System.
This is where you would license any software in the pod and configure any virtual machines as indicated in this guide.
A template pod refers to a pod on a host server that is a full clone copy of a master pod with virtual
machines that are set to templates. This pod and virtual machines cannot be modified. This pod category can also not be
turned online as templates cannot be powered on. There should be a template pod on each host server you plan to run user pods on.
A user (student) pod refers to a pod on a host server that is a link clone copy of the template pod with
virtual machines ready for student reservations.
Linked Clones vs Full Clones Virtual Machines
NETLAB+ can create linked clones or full clones.
A linked clone (or linked virtual machine) is a virtual machine that shares virtual disks with the parent (or master)
virtual machine in an ongoing manner. This conserves disk space and allows multiple virtual machines to use the
same software installation. Linked clones can be created very quickly because most of the disk is shared with the
parent VM.
A full clone is an independent copy of a virtual machine that shares nothing with the parent virtual machine after
the cloning operation. The ongoing operation of a full clone is entirely separate from the parent virtual machine.
Creating Template Pods
The following section describes how to create template pods from the management server to your host servers. In this scenario, we will create full clone template virtual machines using the NETLAB+ pod cloning utility.
Log in to NETLAB+ VE with the administrator account.
Select the Pods icon.

Click on your master pod.
Make sure the pod is offline by selecting Take Pod Offline.
Click the Clone Pod button to create a new pod, based on the settings and snapshots of this pod.

Input a new ID value into the New Pod ID field. It is advised to keep the pods in numerical order.
If the pod IDs are not in numerical order, they will not show up in the scheduler in numerical order.
Click Next.
Enter a name for the cloned pod into the New Pod Name field. For example, Cisco_PTv8_H120_T1001.
Click Next.
Note
The Pod Name identifies the pod and is unique per pod. Here we used the name of the lab set or course in a shortened form along with a host identifier (H120), the type and number of the pod (T1001).
When the action has finished processing, you are presented with a settings screen. Notice each VM has its own tab. Go through each tab and verify the following:
Source Virtual Machine:
From Snapshot should be set to the
GOLDENsnapshot you created previously.
Target Virtual Machine:
For Type, verify that
Fullis selected.For Role, verify that the
Templaterole is selected.For Datastore, verify you selected the correct one.
NETLAB1by default.For Copy BIOS UUID, only choose this option if you wish to preserve the sources VM’s BIOS UUID for the targeted clone VM (when this option is checked, it can help with keeping licensing intact such as Microsoft Windows Licensing/Activation).
When you are done changing settings, click Clone Pod.
This should complete within a minute as we are creating linked virtual machines.
When the pod clone process is finished, click OK.
If you want to dedicate this pod to a particular class, team, or student, use the Pod ACLs feature. For details, see the NETLAB+ VE Instructor Guide.
Repeat these steps for each host server you will have user pods on.
Creating User Pods
The following section describes how to create user pods on the same Proxmox VE Host system that holds your template pod’s virtual machines. In this scenario, we will create linked virtual machines using the NETLAB+ pod cloning utility.
Log in to NETLAB+ VE with the administrator account.
Select the Pods icon.
Click on your template pod.
Click the Clone Pod button to create a new pod, based on the settings and snapshots of this pod.
Input a new ID value into the New Pod ID field. It is advised to keep the pods in numerical order.
If the pod IDs are not in numerical order, they will not show up in the scheduler in numerical order.
Click Next.
Enter a name for the cloned pod into the New Pod Name field. For example, Cisco_PTv8_H120_S1001.
Click Next.
Note
The Pod Name identifies the pod and is unique per pod. Here we used the name of the lab set or course in a shortened form along with a host identifier (H120), the type and number of the pod (S1001).
When the action has finished processing, you are presented with a settings screen. Notice each VM has its own tab. Go through each tab and verify the following:
Target Virtual Machine:
For Type, verify that
Linkedis selected.For Role, verify that the
Normalrole is selected.For Take Snapshot, verify that
GOLDENis inputted.For Copy BIOS UUID, only choose this option if you wish to preserve the sources VM’s BIOS UUID for the targeted clone VM (when this option is checked, it can help with keeping licensing intact such as Microsoft Windows Licensing/Activation).
When you are done changing settings, click Clone Pod.
This should complete within a minute as we are creating linked virtual machines.
When the pod clone process is finished, click OK.
If you want to dedicate this pod to a particular class, team, or student, use the Pod ACLs feature. For details, see the NETLAB+ VE Instructor Guide.
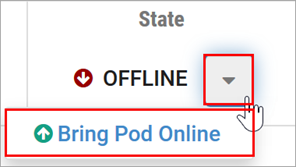
Click the Bring Pod Online from the State dropdown on the Pod Management page to make the pod available.
The user pod can now be reserved. When the reservation becomes active, NETLAB+ will automatically configure virtual machines and virtual networking for your new pod.
Note
The GOLDEN snapshot is the starting point for all pods. We recommend that you reserve the 1st pod and conduct some
labs to make sure the snapshot images work correctly. If there are defects, make corrections to the images to the
master pod, create new template pods, and create new user pods.
Assigning Pods to Students, Teams, or Classes
Please refer to the NETLAB+ VE Instructor Guide for details on using the Pod ACLs feature.